Deploying web applications efficiently and reliably is a critical part of any developer’s workflow and Amazon Web Services (AWS) offers powerful tools to streamline this process. This guide walks you through setting up a seamless deployment pipeline for your Gatsby.js website using AWS CodeBuild, CodePipeline, S3, and CloudFront.
While Gatsby.js provides the framework for building fast and modern websites, the spotlight here is on leveraging AWS’s robust infrastructure to automate the deployment process, ensuring high availability, and delivering your site to users worldwide with minimal latency. Whether you are a seasoned developer looking to enhance your deployment strategy or a newcomer eager to learn about AWS’s capabilities, this guide will provide the insights and steps needed to master website deployment on AWS. From setting up an S3 bucket for storage to configuring a CloudFront distribution for optimal content delivery, we will cover every detail to help you deploy your Gatsby.js site efficiently and effectively.
Link to this project's repo: https://github.com/Joshua-ansah/gatsby-cicd
Let’s dive into the world of AWS and explore how you can use its tools to create a powerful, automated deployment pipeline that ensures your website is always up-to-date and performing at its best.
Detailed Outline of the Process
Step 1: Create an S3 Bucket
- Open the S3 Console
-
Search for S3 in the search bar of the AWS console. -
On the S3 dashboard, click on the “Create Bucket” button on the right.
- Create a New Bucket
-
Choose the general purpose bucket and give it a name. -
Select the appropriate region for your bucket. -
Uncheck “Block all public access” to make the website publicly accessible. -
Enable static website hosting and specify the index document (e.g.,index.html).
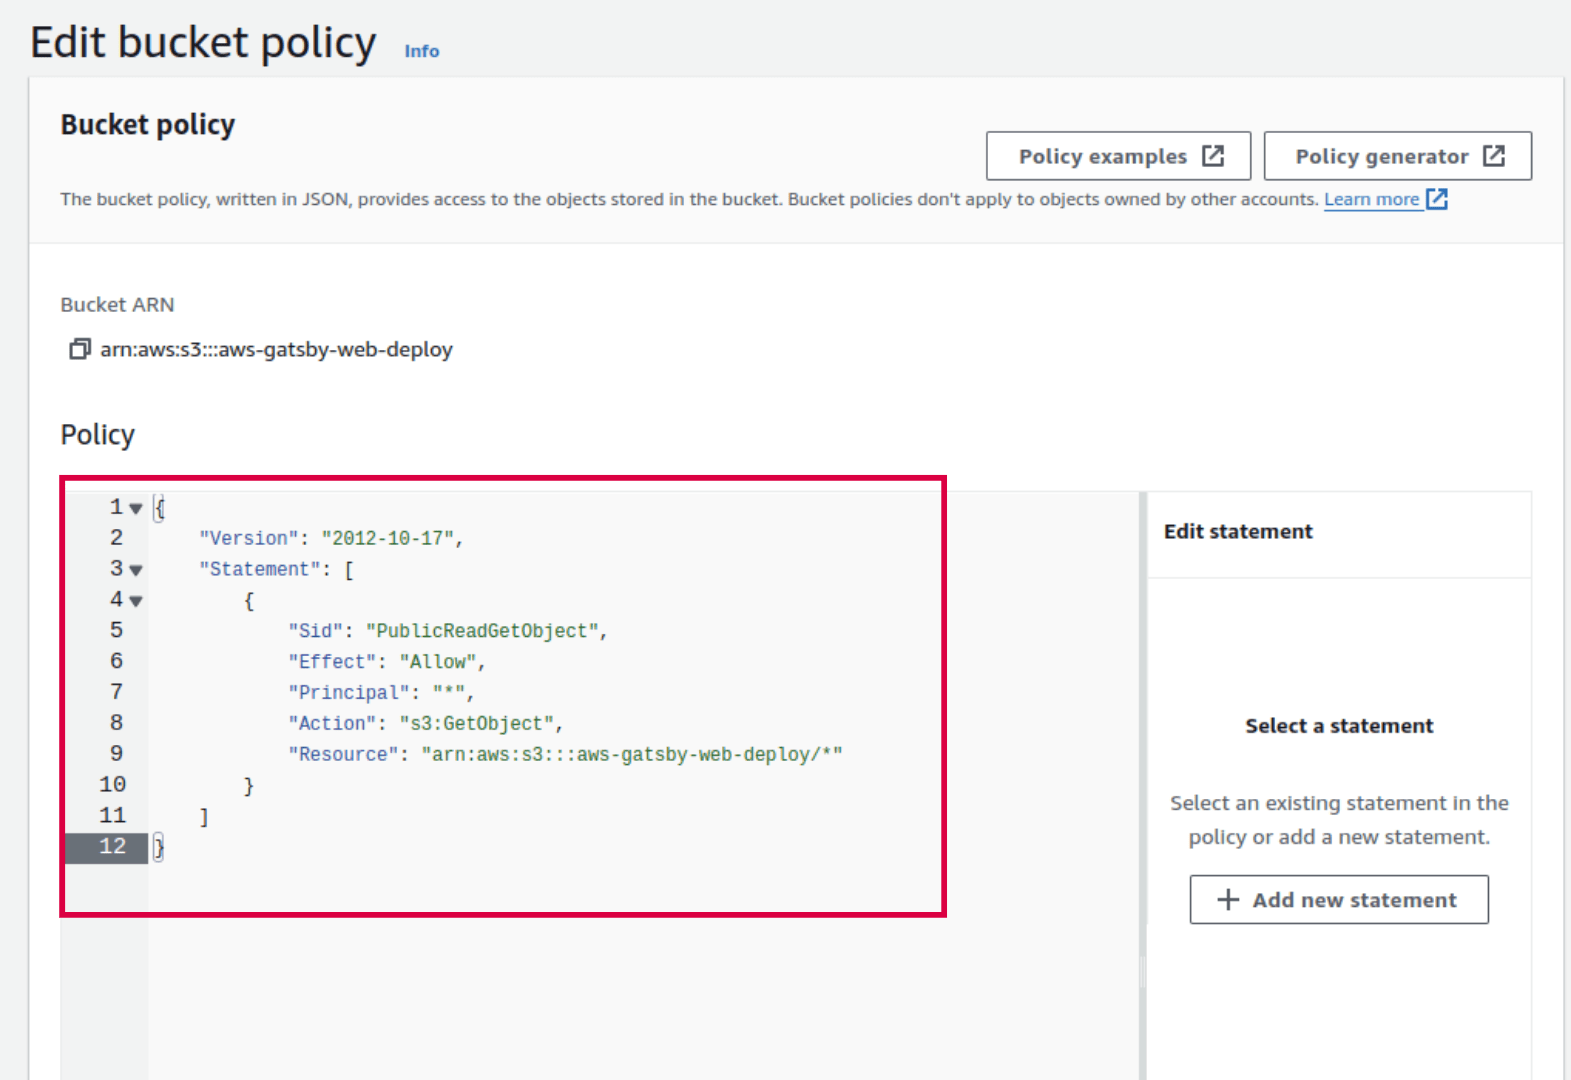
- Set Bucket Policy
Configure a bucket policy to allow public read access:
{

"Version": "2012-10-17",

"Statement": [

{

"Sid": "PublicReadGetObject",

"Effect": "Allow",

"Principal": "*",

"Action": "s3:GetObject",

"Resource": "arn:aws:s3:::aws-gatsby-web-deploy/*"

}

]

}
Like in the image below

Step 2: Create a CloudFront Distribution
- Open the CloudFront Console
-
Create a new distribution. -
Set the origin domain to your S3 bucket URL. -
Set the default root object (e.g.,index.html). -
Enable the Web Application Firewall (WAF) for extra security if needed. -
cache settings and SSL certificates as needed.
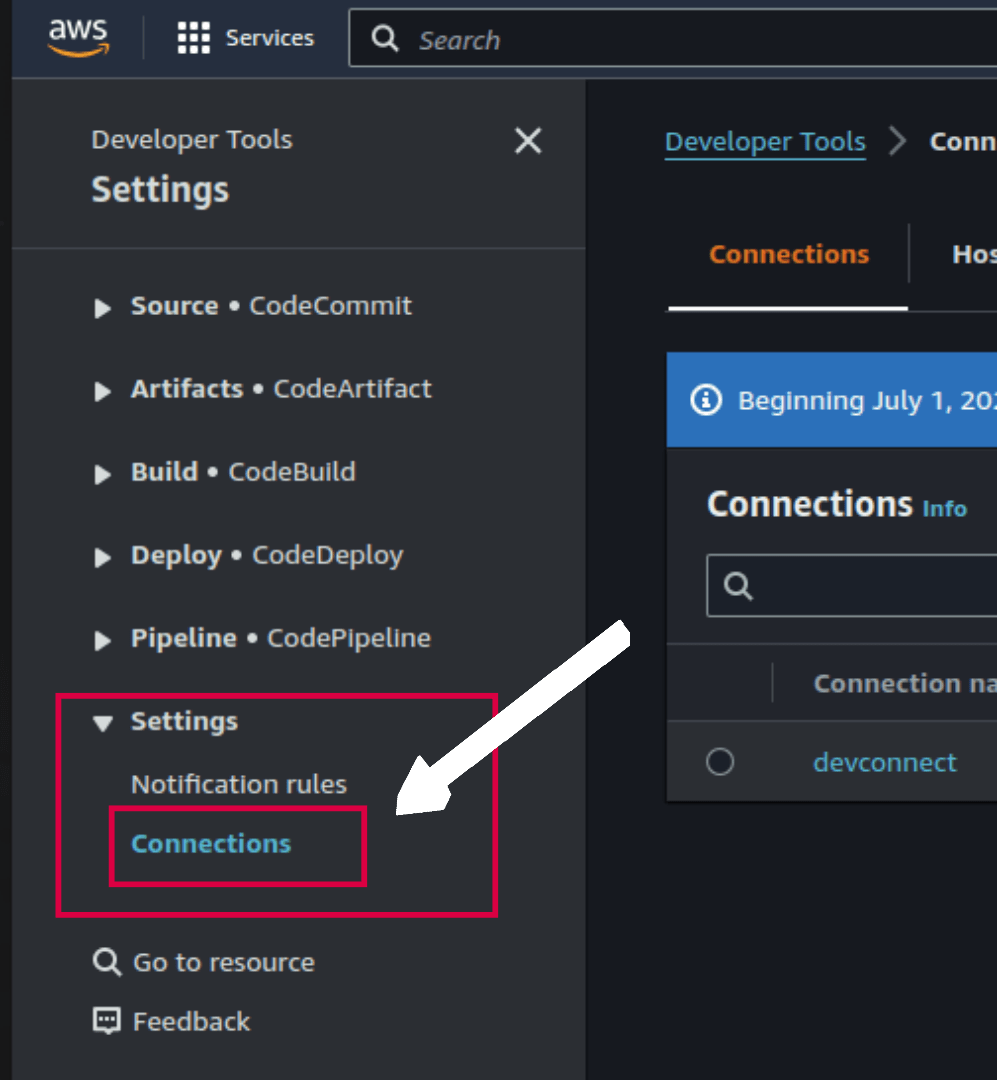
You could optionally set up the AWS Code Commit repository Where you could deploy your code but in this project, We will connect GitHub Account to AWS directly. To do that search for any of the AWS developer tools like AWS Code Build,

Step 3: Set Up AWS CodeBuild
- Create a Build Project
-
Open the CodeBuild console. -
Create a new build project. -
Configure the source to point to your CodeCommit repository or connect your GitHub account directly to AWS. -
Set the environment to use a managed image with Node.js. -
Create abuildspec.ymlfile in the root of your project directory and add the following code:
version: 0.2

phases:

install:

commands:

- npm install

build:

commands:

- npm run build

artifacts:

files:

- '**/*'

base-directory: public

discard-paths: yes
Step 4: Set Up CodePipeline
- Create a Pipeline
-
Open the CodePipeline console. -
Create a new pipeline. -
Configure the source to point to your CodeCommit repository or GitHub repository. -
Add a build stage using your CodeBuild project. -
Add a deploy stage to deploy the built files to your S3 bucket.
Step 5: Configure Triggers
- Configure Triggers
-
Ensure that changes to your CodeCommit repository trigger the CodePipeline. -
This can be done in the CodePipeline configuration to ensure that the pipeline executes whenever code is pushed to the main branch.
Step 6: Test Your Deployment
- Push Changes
-
Push changes to your CodeCommit repository. -
The pipeline should automatically start, build the Gatsby site, and deploy it to S3.
- Verify Deployment
-
Verify that the website is accessible through the CloudFront URL. -
Ensure that changes propagate correctly and quickly.
By following these steps, you can automate the deployment of a Gatsby.js website using AWS services. This setup ensures that your site is automatically built and deployed whenever you push changes to your repository, making it easy to manage updates and keep your site live.
Link to this project's repo: https://github.com/Joshua-ansah/gatsby-cicd
